

Documentation Index
Fetch the complete documentation index at: https://lightdash-docs-deploy-vs-refresh-comparison.mintlify.app/llms.txt
Use this file to discover all available pages before exploring further.
Lightdash supports dbt v1.4.0 and above. If you are using an older version of dbt, you will need to upgrade to sync your project to Lightdash.
Syncing your dbt project to Lightdash
There are five ways to sync changes from dbt into Lightdash. They differ in where the code comes from, where compilation happens, whichprofiles.yml / target governs the result, and whether they respect the project’s UI Connection Settings.
For ready-to-use workflow templates, see the lightdash/cli-actions repo.
Sync mechanisms
1. lightdash deploy from a developer's laptop
1. lightdash deploy from a developer's laptop
Compiles the dbt project locally and pushes the resulting
Use cases: initial project setup, debugging, one-off manual deploys.Trade-offs: bypasses PR review; relies on per-developer
manifest.json to Lightdash.| Property | Value |
|---|---|
| dbt code source | Local working copy (uncommitted changes included) |
| Compile location | Laptop |
profiles.yml source | Local (~/.dbt/profiles.yml by default, or --profiles-dir) |
| Target | Default in that profiles.yml, overridden by --target |
| UI Connection Settings respected? | No |
| Auth | lightdash login session or LIGHTDASH_API_KEY env var |
| Prerequisites | Lightdash CLI installed; dbt installed; warehouse creds reachable locally |
| Remote git connection required? | No |
profiles.yml; high footgun risk if a developer’s prod target accidentally points at a non-prod warehouse.2. lightdash deploy from CI
2. lightdash deploy from CI
Same as #1, but runs inside a CI workflow (GitHub Actions, GitLab CI, Azure Pipelines, Bitbucket Pipelines, etc.) with credentials stored as CI secrets.
Use cases: automated production deploys gated by PR merge; PR preview workflows (
| Property | Value |
|---|---|
| dbt code source | CI runner’s checkout of the repo |
| Compile location | CI runner |
profiles.yml source | Provided by the workflow — either committed as an env_var() template, or written to disk from a CI secret at runtime |
| Target | Default in the CI profiles.yml, overridden by --target |
| UI Connection Settings respected? | No |
| Auth | LIGHTDASH_API_KEY from CI secrets |
| Prerequisites | Lightdash CLI + dbt installed in the workflow; warehouse creds available to CI; valid profiles.yml produced at runtime |
| Remote git connection required? | No |
| Workflow template | deploy.yml in lightdash/cli-actions (GitHub Actions example) |
lightdash start-preview + lightdash validate).Trade-offs: requires duplicating warehouse credentials into CI on top of what’s already in Lightdash; needs dbt available in the runner.3. "Refresh dbt" button in the Lightdash UI
3. "Refresh dbt" button in the Lightdash UI
4. lightdash refresh from CI
4. lightdash refresh from CI
Calls the same endpoint as the “Refresh dbt” button, but programmatically from CI (GitHub Actions, GitLab CI, Azure Pipelines, Bitbucket Pipelines, etc.). Lightdash does the work server-side using the project’s UI Connection Settings.
Use cases: automated post-merge sync to production when the project is already git-connected.Trade-offs: can’t push uncommitted changes (only what’s in the connected branch); won’t catch issues pre-merge — pair with a separate
| Property | Value |
|---|---|
| dbt code source | Lightdash pulls from the remote git source (configured in Project Settings) |
| Compile location | Lightdash servers |
profiles.yml source | Synthesised by Lightdash from UI Connection Settings |
| Target | UI Project Settings → Connection Settings → Target name |
| UI Connection Settings respected? | Yes |
| Auth | LIGHTDASH_API_KEY from CI secrets |
| Prerequisites | Project must have a remote git source connected; Lightdash CLI installed in the workflow |
| Remote git connection required? | Yes |
| Workflow template | refresh.yml in lightdash/cli-actions (GitHub Actions example) |
lightdash validate PR workflow if you want that.5. Pinging the refresh API directly from CI
5. Pinging the refresh API directly from CI
Same as #4, but bypasses the Lightdash CLI entirely — just a
Use cases: the simplest possible automated refresh — no dependencies to install. Useful for teams who don’t want a Node toolchain in CI.Trade-offs: same as #4. The refresh is async (returns a
curl to the API. Works from any CI system (GitHub Actions, GitLab CI, Azure Pipelines, Bitbucket Pipelines, etc.).| Property | Value |
|---|---|
| dbt code source | Lightdash pulls from the remote git source (configured in Project Settings) |
| Compile location | Lightdash servers |
profiles.yml source | Synthesised by Lightdash from UI Connection Settings |
| Target | UI Project Settings → Connection Settings → Target name |
| UI Connection Settings respected? | Yes |
| Auth | LIGHTDASH_API_KEY from CI secrets |
| Prerequisites | Project must have a remote git source connected |
| Remote git connection required? | Yes |
| Lightdash CLI required? | No |
| Endpoint | POST /api/v1/projects/{projectUuid}/refresh |
jobUuid); for stronger guarantees, poll GET /api/v1/jobs/{jobUuid} to confirm completion before exiting the workflow.lightdash deploy vs lightdash refresh
The two CLI commands above (lightdash deploy and lightdash refresh) are often confused. Here’s the quick difference:
lightdash deploy | lightdash refresh | |
|---|---|---|
| What it does | Pushes your local dbt project to a Lightdash project. Runs dbt compile (or dbt list) locally to produce a fresh manifest.json, then sends the compiled models/explores to the Lightdash server. | Tells the Lightdash server to re-pull from the connected git remote and recompile, server-side. No local dbt run, no local files involved — it’s the API-driven equivalent of clicking Refresh dbt in the UI. |
| Where compilation happens | Locally (laptop or CI runner) | Lightdash servers |
| Requires a remote git connection? | No | Yes |
| Flags | Many (--project, --select, --full-refresh, --create, --use-batched-deploy, etc.) | Essentially none (just --verbose) |
| Use when | You’ve changed dbt models or Lightdash YAML metadata locally and want those changes to land in a Lightdash project. | Lightdash already points at a git repo and you just want it to pull the latest. |
- Local dbt code you want to push →
deploy - Lightdash already points at a git repo and you just want it to pull the latest →
refresh
Decision matrix
#1 lightdash deploy — local CLI | #2 lightdash deploy — CI | #3 “Refresh dbt” — UI button | #4 lightdash refresh — CI | #5 POST /refresh API — CI | |
|---|---|---|---|---|---|
| Automated? | No | Yes | No | Yes | Yes |
| Pushes uncommitted local changes? | Yes | No | No | No | No |
| Needs dbt + warehouse creds in CI? | N/A | Yes | No | No | No |
| Needs Lightdash CLI installed? | Yes | Yes | No | Yes | No |
| Respects UI Target name? | No | No | Yes | Yes | Yes |
| Works without a remote git connection? | Yes | Yes | No | No | No |
| Catches breaking changes pre-merge? | With --select + validate | If used in a PR workflow | No | No | No |
| Best for | Initial setup, debugging | PR previews; CI deploys with no remote git connection | Ad-hoc UI refresh | Post-merge sync (recommended) | Post-merge sync, minimal-CI shops |
Recommended setups
Most teams (Lightdash connected to GitHub, GitLab, Azure DevOps, Bitbucket, or dbt Cloud):- PR workflow →
lightdash start-preview+lightdash validate(mechanism #2 withstart-preview) - Post-merge to
main→lightdash refresh(#4) or the refresh API (#5) - Manual UI refresh (#3) available for ad-hoc syncs
- Production sync →
lightdash deployin CI (#2) - Previews →
lightdash start-previewin CI
- Local
lightdash deploy(#1) for first-time setup, then graduate to one of the automated patterns above as soon as the project is stable.
Things to know
lightdash deploy does NOT use the UI “Target name” setting. It uses the local profiles.yml default, or whatever --target overrides it with. Only mechanisms #3, #4, and #5 respect the UI Target name.lightdash refresh requires a remote git connection. It will fail with a ParameterError if the project’s dbtConnection.type is NONE.Refresh is async. Both #4 and #5 return a
jobUuid and the work continues server-side. If your CI needs to know the refresh succeeded, poll GET /api/v1/jobs/{jobUuid} before exiting the workflow.How to trigger each sync
Click “Refresh dbt” in Lightdash
The button can be found on the Query from tables page.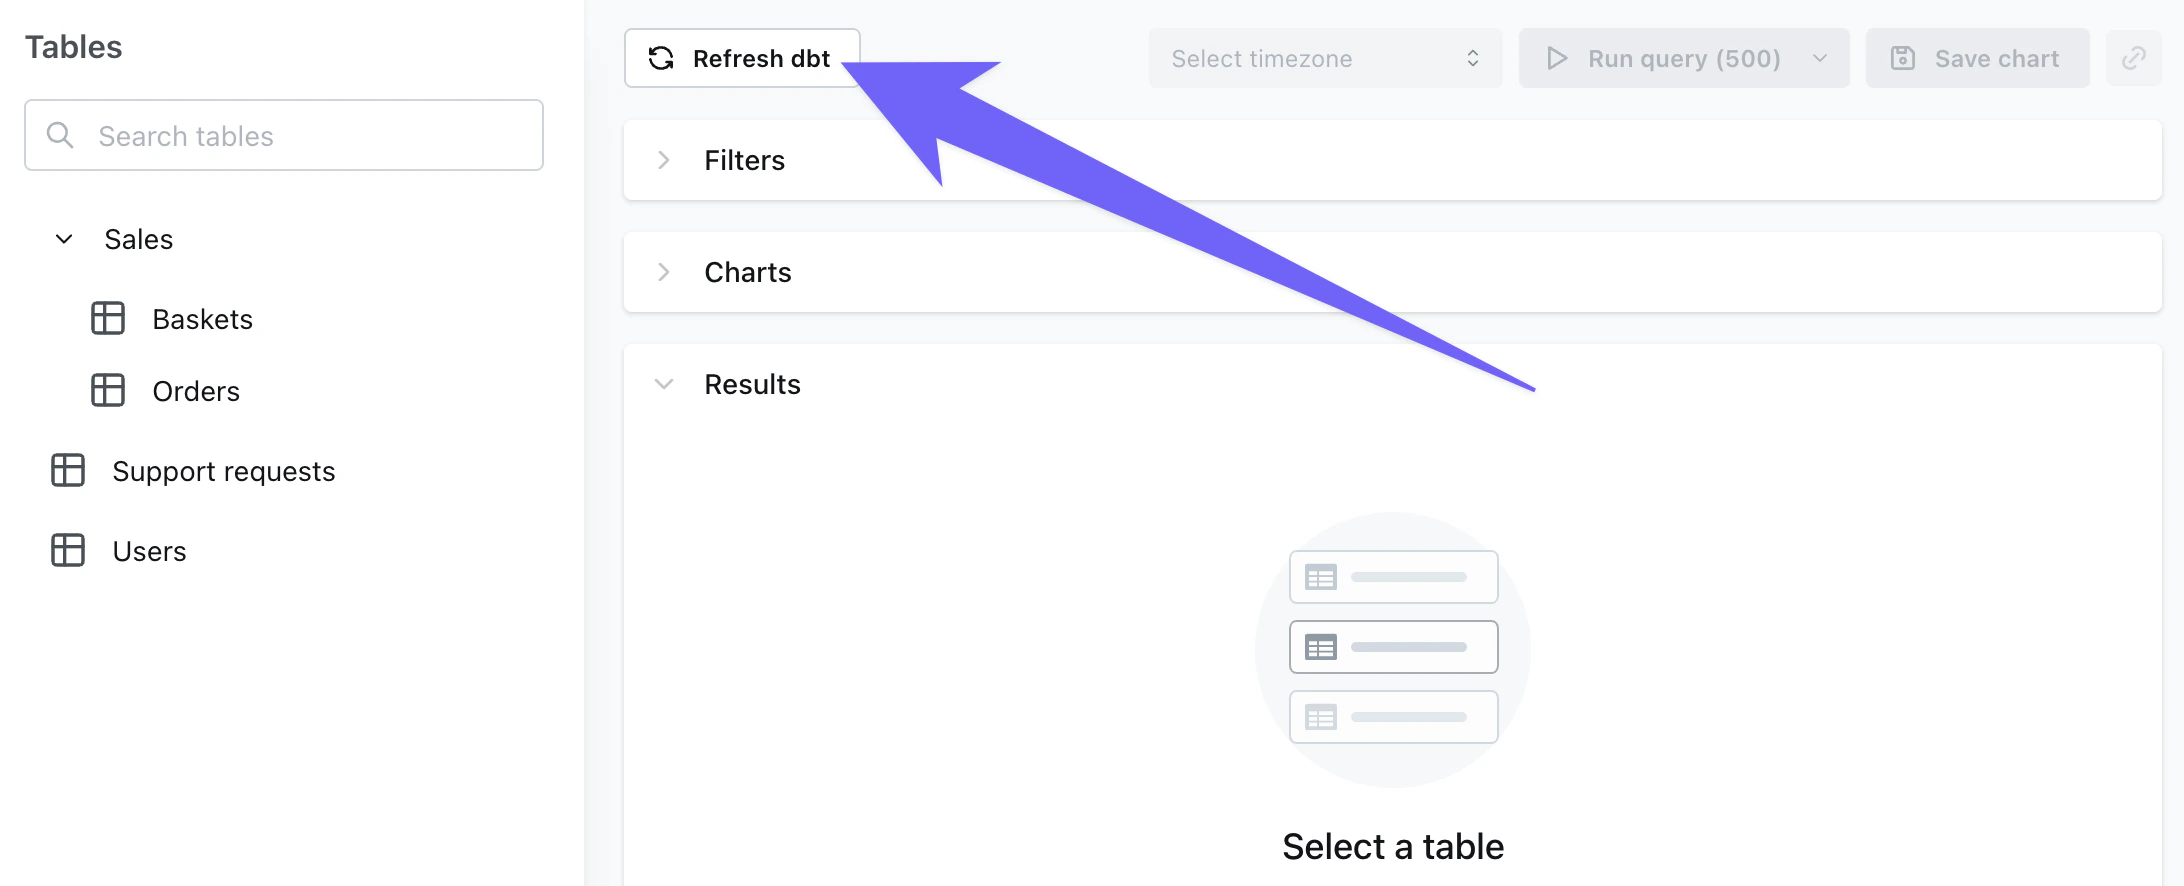
Refresh dbt.
If you’ve made any changes to the underlying data (for example, adding a new column in your
model.sql file or changing the SQL logic of a dimension), then you need to run dbt run -m yourmodel before you click Refresh dbt in Lightdash.Push code from the CLI
If you’re using the Lightdash CLI, you can uselightdash deploy to deploy your changes to Lightdash. Read more about how to use lightdash deploy.
Set up continuous deployment
Read how to do that and check out our example workflow files.dbt project settings
For more information about dbt connection types (Github, Gitlab, Bitbucket, etc.) and the fields required for each type, read the dbt project section in our connection guide. Below are details about the universal fields for all connected dbt projects.dbt selector
This setting is found under Advanced configuration options
my_model and all models with the lightdash tag in Lightdash, you can add the following to your dbt project settings:
dbt targets
What is a dbt target?
A dbt target is an environment configuration in your dbt project that defines where and how dbt should run. In dbt Core, targets are defined in yourprofiles.yml file and typically include settings like:
- Database connection details
- Schema/dataset names
- Warehouse specifications
- Other environment-specific configurations
dev- for development workprod- for production deploymentsstaging- for testing before production
profiles.yml file below shows different connection settings for the dev and prod targets. Note that on line 3 target: dev indicates that the dev target is the default target for this project.
Configuring your target in Lightdash
Target contains information about your dbt connection to your warehouse. By default, we set this to be the same value as you have as the default in yourprofiles.yml file when you run lightdash deploy (if that’s how you created or recently deployed your project). If you want to update this, you can enter the target of your choice in the project settings (for example prod or analytics).
Read more about dbt targets in the dbt docs.
How targets work with dbt macros
When Lightdash connects to your dbt project, it compiles aprofiles.yml file based on the connection settings you configure in the Lightdash UI or the connection settings from your profiles.yml if you deployed your project from the CLI using lightdash deploy. This means that any dbt macros in your project that use target settings will be executed by Lightdash and resolved according to those settings.
Why use targets in macros?
You might want dbt to behave differently depending on the target/environment you’re running in. Common use cases include:- Using different schema naming conventions in dev vs. production
- Configuring different warehouse sizes (small for dev, large for prod)
- Adjusting query performance settings per environment
- Loading different amounts of data (sample data in dev, full data in prod)
- Applying different data retention policies
Example: Schema naming based on target
By default, dbt appends your custom schema names to your target schema. For example, if your target schema isanalytics and you configure a model with schema='staging', dbt creates it in analytics_staging.
This default behavior is useful in development because it prevents developers from overwriting each other’s work - each developer can have their own target schema like dbt_jane or dbt_john, resulting in separated schemas like dbt_jane_staging and dbt_john_staging.
However, in production, you typically want cleaner schema names. Instead of analytics_staging, you just want staging. This is where customizing the generate_schema_name macro based on the target becomes helpful.
Default behavior:
target.name == 'prod'), use just the custom schema name. Otherwise, use the default behavior of prefixing it.”
How this works in Lightdash:
If your Lightdash connection settings specify:
- Target name:
prod - Dataset/Schema:
analytics
staging schema - not analytics_staging - because target.name == 'prod'.
This gives you clean, professional schema names in production (staging, marts, reporting) while maintaining developer isolation in development environments (dbt_jane_staging, dbt_john_staging).
Example: Warehouse configuration
Similarly, if you have a macro that dynamically configures settings:
Differences between dbt Core and dbt Cloud
In dbt Core, teams commonly use targets to manage different environments. In dbt Cloud, targets are replaced by environments, and custom logic such asif target.name = dev then... is commonly swapped out using env vars to become ‘if env_var = development then…’ or similar.
dbt environment variables
What are environment variables?
Environment variables allow you to set dynamic values that your dbt macros can reference. This is particularly useful if your dbt project uses environment variables to control behavior (common in dbt Cloud setups).Configuring environment variables in Lightdash
This setting is found under Advanced configuration options
profiles.yml file, you can add these to Lightdash in your project settings. For each environment variable, you’ll need to add the key + value pair for the item.
You’ll normally find these values in a file called .env in your dbt project directory.
For example, you might have something like:
.env file like:
key as DBT_USER and value as myspecialuser.
How environment variables work with dbt macros
When Lightdash compiles your dbt project, any environment variables you configure will be available to your dbt macros through theenv_var() function.
For example, if you have a macro that checks an environment variable:
DBT_ENV=production as an environment variable in your Lightdash connection settings to ensure the macro resolves to prod_analytics.
Key points about environment variables:
- They’re available to all macros in your dbt project via the
env_var()function - They’re particularly important if your dbt project was built for dbt Cloud, which relies heavily on environment variables
- Make sure to set any environment variables your macros depend on in Lightdash to match your production dbt environment
Key takeaways
- Lightdash compiles your dbt project using the target name and other settings you configure in the connection settings
- Any macros that use
target.name, environment variables, or other profile settings will resolve according to your Lightdash configuration - Make sure your Lightdash target name matches the target you use for your production dbt runs to ensure Lightdash behaves consistently with your dbt project
- If you have custom macros that depend on target settings or environment variables, ensure those settings are configured correctly in your Lightdash connection settings